Friday, November 11, 2022

Christmas Coal Candy


 INGREDIENTS

4 T. butter
5 c. marshmallows
2 regular size packages of Oreos

DIRECTIONS

Place Oreos in a food processor and pulse until crushed into powder. Set aside. Turn stove onto medium heat and melt butter in a large saucepan. Add marshmallows to butter and stir until melted. Add crushed Oreos to the butter and marshmallows. Once combined, pour into a greased 8x8 baking dish. Cut into squares once the Coal Candy has cooled and set. 

Wednesday, November 9, 2022

Disneyland Churro Toffee


INGREDIENTS

½ c. sliced almonds

1 c. butter

1 c. granulated sugar

⅓ c. packed brown sugar

2 T. water

½ tsp. Baking soda


Coating:

16 oz. white chocolate candy coating

½ c. granulated sugar

1 T. cinnamon


DIRECTIONS

Preheat the oven to 350 degrees. Spread sliced almonds out on a baking sheet and bake for 6 minutes. Be careful not to let them burn. Cool and chop.


Line a separate baking sheet with parchment paper and spray with cooking spray. Sprinkle chopped almonds evenly onto parchment paper.


Melt butter in a saucepan over medium-high heat. Once melted, add water, granulated sugar and brown sugar. Bring to a boil and stir constantly until your candy thermometer reaches the hard crack stage of 300 degrees F.


Remove from heat and stir in baking soda. Immediately pour toffee over the sliced almonds onto the baking sheet. Using a greased spatula, spread toffee evenly. It will harden quickly so work fast!


If you would like to cut your toffee into squares, use a greased knife and score before toffee completely hardens. Otherwise you can wait for the toffee to harden and then break into random pieces. 


Melt white chocolate in a bowl. In a separate bowl combine ½ c. granulated sugar and cinnamon. Coat each toffee piece in white chocolate and then sprinkle all sides with cinnamon/sugar mixture. Set pieces on a cooling rack until completely cooled.

Monday, October 17, 2022

Flour Tortillas


INGREDIENTS 

4 1/2 c. Flour
3 tsp. Salt
1 1/2 T. Baking Powder
3/4 c. Unsalted Butter
1 1/2 c. Water
Extra flour for rolling tortillas


DIRECTIONS

Combine flour, salt and baking powder in a medium sized bowl. In a separate bowl warm butter and water in microwave until melted. Add butter/water to flour mixture and stir. Knead dough with your hands for several minutes until dough is well combined. Cover with plastic wrap and let rest for 15 minutes. Separate dough into approximately 17 equal sized dough pieces and shape into balls. Place dough balls back in bowl and cover for another 15 minutes. Roll dough balls separately out on a lightly floured surface until approximately 10-12 inches round. Cook each side in a skillet on medium heat until lightly browned. 


Sunday, September 11, 2022

Pickle de Gallo


A delicious and healthy alternative to regular salsa and a great and easy way to use up some of those garden vegetables that are just waiting to be eaten!

INGREDIENTS
1 large cucumber, finely chopped
1 c. dill pickles, finely chopped
1/2 c. red onion, finely chopped
1 red bell pepper, stem and seeds removed, finely chopped
1 garlic clove, minced
1 jalapeƱo, finely chopped (remove seeds for less heat)
1/2 c. brine from jar of pickles
salt, to taste

DIRECTIONS
Combine all ingredients into a bowl and mix until combined. Cover and refrigerate for an hour until ready to eat. Enjoy with your favorite tortilla chips!


Wednesday, August 31, 2022

Grilled Corn Salsa


A great recipe to use fresh veggies from your garden!

INGREDIENTS
5 ears of corn on the cob
1 bell pepper, any color
1 jalapeno
1-2 poblano peppers or another similar pepper.
1 red onion
1 lime
Olive Oil
1/2 bunch of Cilantro
Salt, to taste


DIRECTIONS
Lightly oil corn and place all veggies on the grill. Turn veggies often and cook on medium high for approximately 15 min until charred. Place peppers in a brown paper sack or closed container and let steam for 15 minutes to help remove outer skin.  (Make sure you also remove the seeds) Cut corn off cobs and put in a bowl with chopped peppers, onion and cilantro. Season with squeezed lime and salt. 

Can be eaten with chips as a salsa or serve over tacos. 


Tuesday, August 30, 2022

Garden Scrambled Omelette


One of my favorite things about gardening is finding ways to use the fresh vegetables in our cooking. Omelettes are so versatile because you can add whatever ingredients you like and the options are endless. It's also healthy and filling! 

INGREDIENTS
3 eggs
2 T. milk
Shredded Cheese
Cherry Tomatoes
Bell Pepper
Kale/Spinach
Jalapeno Pepper
Red Onion
Zucchini
Butter to sautƩ vegetables
Bacon, cooked and crumbled 
Salt & Pepper

DIRECTIONS
Crack eggs into a bowl, add milk and whisk until combined. Add salt and pepper to taste and set aside. 
Chop all vegetables to equal approximately 1/3 cup. In a fry pan on medium heat add a little butter and sautƩ veggies for 1-2 minutes. Pour eggs over veggies and sprinkle with bacon and cheese. Slowly stir until eggs are cooked to desired consistency. Plate and enjoy.


What is your favorite combination of ingredients for an Omelette?

Flower Planters


This year I have been focusing a lot of my time to learning everything I can about flower planters. Working part time at a green house helped me to ask a lot of questions and learn some basic skills about planting flowers, growing environments, fertilizing, watering and deadheading. For 16 years I've bought flowers at the green houses and arranged pots in a way that I thought would look best but it was so much fun to learn about simple growing principles that hadn't crossed my mind.

A few notes:


Begonia's love shade. The flowers are edible! I think they have citrusy taste and would be a good edition to salads. Begonia's have a male and female flower and of course the male flower is larger and more full than the females. If you want larger male flowers simply pluck the females off once they have bloomed. 


Begonia leaves do not like water....it can aid in dry ugly burn marks on the leaves. It is best to water underneath the leaves close to the roots. 


My youngest loved coming over to visit us at the greenhouses and even got to plant her own planter. She had the best time walking around deciding which flowers she wanted in her pot and arranged them beautifully!


Can you spot the hummingbird? They love planters, especially these beautiful fuchsia flowers. If you want to attract hummingbirds and bees, add more variety of flowers to your yard! They are so much fun to watch. Fuchsia do better in part sun environments so mine have struggled a bit in this hot summer weather but I couldn't resist trying because they are so beautiful.


Normally the garden center I work for doesn't provide a service of planting herb containers but a lady talked us into it and I had a lot of fun planting and watching these herbs grow. It probably would've been best to plant 2 separate containers because some herbs grow better together than others but she wanted a little of everything so here we go! 


A shade planter...I love the colors!


A picture of the planters right after I moved them out of the greenhouses. They had been growing for about a month. It's important to water full sun planters every day and fertilize once a week. You can tell the difference below how much the flowers have grown over the pots. I love how they drape onto the ground. 


Sweet potato vines are the bright green leaves. They thrive in sun and definitely don't like cold weather. We had a cool spring and had to protect them a few times so they wouldn't die. Bugs also love sweet potato vines and will eat holes thru your beautiful plants so its best to spray a bug preventative every couple of weeks or more if they are downright pesky.


Lastly, when deciding what to plant remember 3 things.....thriller, filler, spiller. A thriller is something that will grow tall in the middle such as a spike, Canna Lily or Ornamental Grass. Second, you want to add fillers around the thriller such as Begonia's or Geraniums. And lastly, the best things to grow around your edges are spillers such as Sweet Potato Vine, Bocapa, Lobelia's, Verbena's or anything else that likes to drape beautifully over your pots. 


Monday, August 29, 2022

Green Beans


One of the first decisions you need to make when deciding to grow green beans is if you want to grow Bush Beans or Pole Beans. Bush Beans are just that....a bush. They do not need some sort of trellis to grow up and they stay low to the ground. Pole beans are a vine and they love creeping and crawling up something.  My husband added this trellis to the garden when building our garden boxes and it is one of my favorite things. I love seeing what vegetables love attaching themselves to it and to see how far they decide to grow up. It is a 6 1/2 ft. trellis and usually the green beans can get almost 3/4 the way around. Watching the beans grow and hang is a really fun sight. 


One thing we have learned with a trellis is that as the vegetables grow it creates a canopy of shade which can be a good and a bad thing. It takes some planning ahead in the spring to decide what vegetables will survive the late summer and if the green beans or other pole climbing plants will shield lower growing plants from the extra needed sun.

Two other words that are thrown around a lot are determinate and indeterminate. Determinate usually means that the crop you plant is going to be harvested all at once while indeterminate will keep producing over its entire growing season, continually adding new flowers that turn into beans. Bush Beans tend to be a determinate plant with flowers and beans developing at the end of the branches while Pole Beans are classified as indeterminate because the vines will continuously keep growing while adding additional flowers and green beans over a longer period of time. 

Bottom line is they are both great! The decision usually rests on what you have garden space for and personal preference. I know people who only prefer the flavor of canning Bush Beans. I love using trellis plants to use my space more effectively. This year I planted Bush and Pole Beans in different spaces and they both have been producing continuously. Go figure! One of my favorite things about gardening is the trial and error and all the surprises a long the way.


When we can't keep up with eating fresh produce I usually do 3 things: share with a friend, freeze or can. Freezing Green Beans is the fastest way to preserve your garden produce if you have the space. Simply break off the ends, blanch in boiling water for 3 minutes, cool for several minutes in cold ice water to preserve freshness and color, drain and then package in your favorite freezer bags to store in the freezer (6 mo to a year). I love using a food saver machine because the bags and sucking out the extra Oxygen help protect the food long term and from freezer damage. 


What is your favorite way to use Green Beans? 

Sweet Success Cucumbers

Our cuc vines have been pushing out some great cucumbers this year. These Sweet Success Cucumbers are so mild and sweet that they have quickly become a summer favorite. Sometimes when cucumbers get too big they become bitter to the taste but even when these sneaky cucumbers don't want to be found until they are giants we have been surprised to find they still have plenty of juice, crunch and continued mild flavor.  


I like to find ways to use them in drinks. The easiest and most refreshing way is simply by adding a few to your water. Throw in a couple lemon slices and mint leaves and you have a beautiful and energizing flavored water to keep you going throughout the day.


My kids can't pass up an after school snack and slicing up cucumbers with some of their favorite dips helps curb their hunger until dinner. Some of their favorites are simply ranch dip and hummas. Or why not sprinkle a few with salt, Tajin or drizzled with a bit of lemon?! Adding flavor keeps my kids from remembering they are eating something healthy. 


Do you have a favorite appetizer or beverage using fresh garden cucumbers? What is your favorite variety of cucumber?


Thursday, August 18, 2022

Fall Gardening

Usually when late summer hits I start to experience a bit of burnout with gardening. It takes a lot of work to keep those plants beautiful and thriving. The thought of planting a fall crop seems exhausting but I had the space and time this year and decided to give it a try. Two of the most important things to think about if you are considering planting a fall crop is to know the first expected frost date for your zoned area and to know which plants have the shortest and fastest growing season so that your vegetables will have time to mature before cold weather sets in. One of the easiest ways to do this is to check your packets for an approximate expected harvest date. Radishes are one of the quickest growing vegetables and can mature in as little as 23 days. You will want to find other vegetables that can mature around 45-60 days. All vegetables have different varieties that will mature in shorter or longer amounts of times so don't expect all cucumber seeds to mature at the same rate. Some have significantly longer growing seasons. These are some of the vegetables I decided to take a stab at growing this fall. Since we can't predict the weather, it's not always a guarantee that we will make it to a harvest date for every vegetable but practicing is half the battle! All of these vegetables listed their harvest dates in less than 60 days. Our weather currently has been hot but we've had a lot of cloud cover which I think has helped significantly with keeping the soil wet enough to germinate seeds. I planted a week and a half ago and everything is popping up nicely. Fingers crossed that we have a mild fall and everything will keep producing!


Some of my red onions decided they were done growing so we pulled and laid them out on a drying surface in the garage to cure. This allowed for some extra space to grow radishes, carrots, green onions and beets.


Also have lettuce, swish chard and spinach growing where our spring crops were done producing and we cleaned out. I think the tomato and tomatillo plants will provide the extra shade needed for these cooler weather crops if we still have some lingering hot days of summer.


Squash and cauliflower plants are thriving in the warm soil.  Keep growing!


Do you plant a fall crop? What have you been successful at growing before cold weather hits?


Wednesday, August 10, 2022

Cucumbers and Pickling


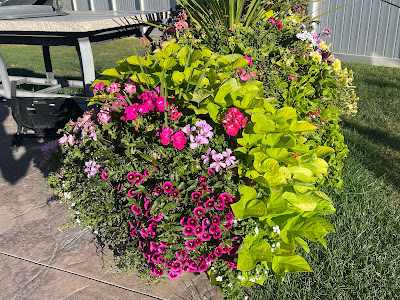
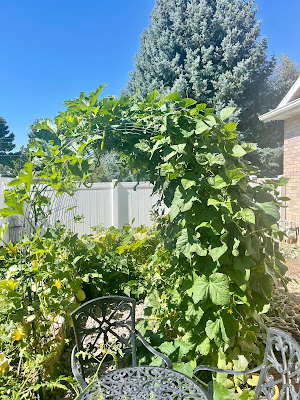
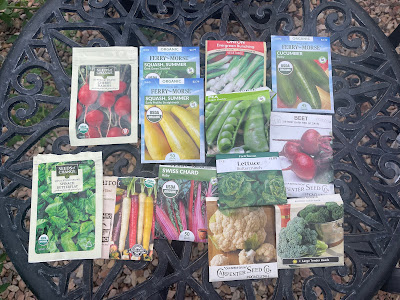
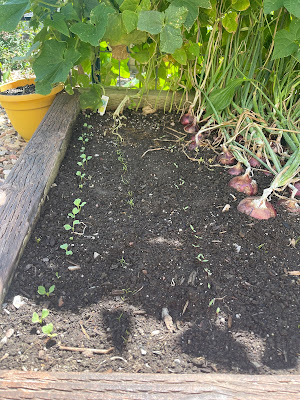
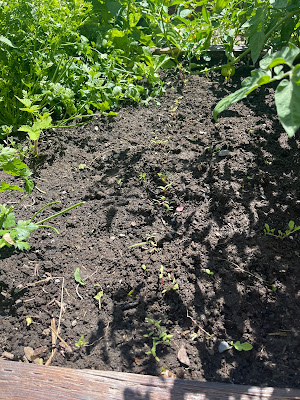
Gardening is one of my favorite things to do. I love researching and planning out ahead of time what I want to grow for the year. Creating a map of where I think things will grow best in our raised garden beds helps me to be prepared when it comes time to plant. Watching things grow from a tiny seed to a beautiful plant that my family can eat is hugely satisfying. I feel like the more years I garden, the less I really know. Gardening takes trial and error, patience, practice and not giving up but the rewards are addicting. Some years we'll have great success with tomatoes and then the very next year do the same thing but might end up disappointed. I love the problem solving aspect with trying to figure out which plants need the most sunlight or shade, best watering techniques, getting rid of pesky bugs, best times of year to plant depending on your growing season, and how to fertilize. One of my favorite aspects of gardening has always been with how to maximize smaller spaces to get the most produce possible.  We've been working on adding trellis's to our garden which creates an added dimension as you watch these beautiful green plants climb high into the sky.  

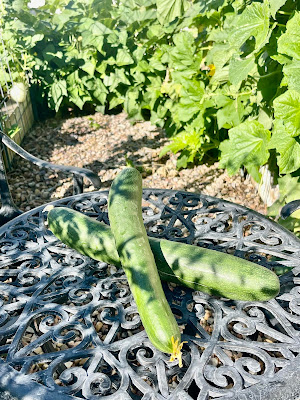
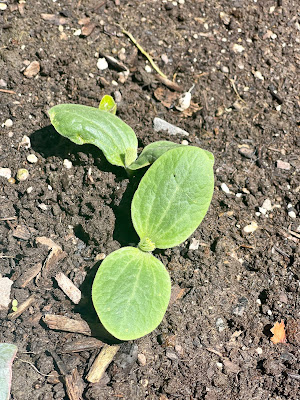
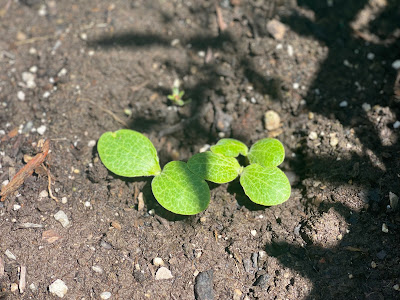
One of my favorite things to grow this year has been cucumbers. They are sneaky little buggers. Ive been watching on the trellis for weeks thinking we weren't going to get any and then all of a sudden they were there.....giants! Normally at this size my cucumbers would have a bitter taste but these Sweet Success Cucumbers have been fantastic. I would definitely recommend this variety! 

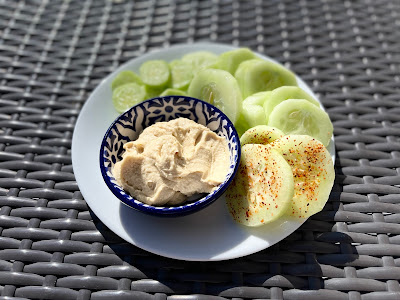
What is your favorite way to eat cucumbers?


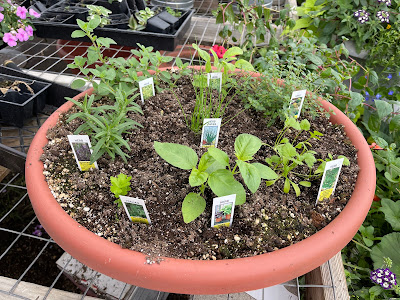
One complication I have been working on is where my herbs can thrive. Some herbs are super temperamental in how much water and sunlight they like to receive each day. This year I have had a lot of success with keeping most herbs in individual pots on the west side of our garden. Other taller vegetable plants have given them extra shade and they have thrived on the extra hot summer days. This dill plant has been a god-send when we decided to can pickling cucumbers last week.


I have been hesitant to can pickles. Crunch is important to me and the more I read about preserving and other people's fails, the less confident I felt about the effort in canning pickling cucumbers and creating something my family would actually like and eat. Here are 2 recipes that were successful for us this year and the things I learned.

1. Stick with tried and true recipes which include recipes from the Ball canning book/website.
2. Use 1/8 tsp. xtra crunch pickling crisp granules for pint jar and 1/4 tsp. granules for quart jar. This helps the cucumbers not get mushy.
3. You can use dry dill but I prefer fresh. 
4. If you want to can and store vegetables long term you need to plant multiple plants that can produce higher yields in a shorter amount of time. Getting a couple cucumbers off 1 plant each week isn't going to be worth your time. This year I planted 3 plants and I'm still not getting enough pickling cucumbers to equal a batch worth processing. My brother planted 20+ pickling cucumber plants. This allowed him to process several batches each week and then share....because they keep coming! The first week I processed 25 pint jars of dill and bread and butter pickles. Last week with 4 gallon ziplock bags we processed 11 quart jars. 


Dill Pickles

INGREDIENTS
8 lbs. 4-6 inch pickling cucumbers, cut to desired length
3/4 c. sugar
1/2 c. canning salt
1 quart vinegar
1 quart water
3 T. mixed pickling spices
green or dry dill (1 head per jar)
garlic cloves
1/4 tsp. xtra crunch granules per quart jar or 1/8 tsp. per pint jar)

DIRECTIONS
Wash cucumbers. Slice off ends and cut to desired length. Combine sugar, salt, vinegar and water into a saucepan. Tie spices into a spice bag and put into the vinegar mixture. Simmer for 15 minutes. Add dill and a garlic clove to each jar. Pack cold and cut cucumbers tightly into hot jars. Ladle the hot liquid over cucumbers, leaving 1/4 inch headspace. Add xtra crunch granules to top. Remove air bubbles and clean off rim of jars. Put on lid and ring. Process pints and quarts for 15 minutes in a boiling water canner.Turn off heat and remove jars. Let cool for 12-24 hours. Check lids to make sure they have sealed.


Bread and Butter Pickles

INGREDIENTS
3 1/2 lbs. pickling cucumbers (about 14 small to medium)
2 1/2 c. vinegar
2 1/2 c. sugar
1/4 c. Bread and Butter Pickle Mix

DIRECTIONS
Wash cucumbers. Slice off ends and cut to desired length. Combine vinegar, sugar and Bread and Butter Pickle Mix to saucepan and bring to a boil.

Pack pickling cucumbers tightly into a jar and then add liquid, leaving 1/4 inch headspace. Add xtra crunch granules to top. Remove air bubbles and clean off rim of jars. Put on lid and ring. Process pints and quarts for 15 minutes in a boiling water canner. Turn off heat and remove jars. Let cool for 12-24 hours. Check lids to make sure they have sealed.


Sunday, March 20, 2022

Gardening Week 1


Have you started your indoor garden seeds yet for Spring? Now is the time! We are a little late in getting some things off to an earlier start but that's ok! It's all about trying. Some things we succeed at and other times it ends up being a fail. That's why it's super important to try again and again and if all else fails, then run to the local garden center for a plant! Just like artichokes. 

We should've started from seed around January 5th. Last year was our first try at growing artichokes. I found some beautiful plants at a local garden center and decided to give it a try.  Some things I learned.....they take up a lot of space! Artichokes have large beautiful green pokey leaves that require quite a bit of room to spread out and grow. Also, be patient. You get to look at those large beautiful green pokey leaves for quite a long time before an Artichoke will begin to emerge. Lastly, we got several artichokes off from each plant. I think we would've had more if our growing season was longer. Hopefully we will have success again this year!


It's important to find out what zone you live in so you can plant at the appropriate times and actually get a crop. I live in an area of USDA Hardiness Zones 6b and 7a so these are the things we planted from seed this week:

Bell Peppers
JalapeƱos
Poblano Peppers
Celery
Oregano
Rosemary
Thyme
Sage
Basil
Broccoli
Cabbage
Cauliflower
Eggplants
Kale
Tomatoes
Leeks
Brussel Sprouts
Mint
Kohlrabi
Lettuce
Swiss Chard
Tomatillos
Chives

Radish seeds can currently be planted in your garden outside. Also this week we will be trying to get Peas, Spinach, Carrots, Dill, and Pak Choi seeds in the ground.  I will keep you updated with our progress. What are your favorite things to grow? 

Ruth's Mile High Biscuits

INGREDIENTS
2 1/2 c. all purpose flour
1 1/2 tsp. salt
1 T. sugar
1 tsp. baking powder
1 tsp. baking soda
3 oz. butter, chilled and cut into small cubes
3/4 c. cold buttermilk
1 large egg, beaten
1/4 c. water

DIRECTIONS
Preheat oven to 425 degrees F. Using a pastry cutter or fork, combine flour, salt, sugar, baking powder, baking soda and butter until crumbly. Add buttermilk, egg and water. Mix just until dry and wet ingredients are combined, don't over mix.


Put dough on lightly floured surface and form into a 6x6 square. Slice into 9 even squares. Move dough to a lightly greased 9x9 baking dish. Bake at 425 for approx. 15 minutes. Serve while warm!